My little sister Summers cake was one for the books. Many months of planning and work went into this Sartell Girls masterpiece.
 Summer's original drawing she had kept and worked on for many years.
Summer Heather’ cake was a three-month production from start to finish. We actually were trying re-invent the wheel with this eye-popping cake. Summer had drawn and re-drawn her cake for four years. This is the original drawing. I'm sure glad she is the last child and this was our last wedding to plan and implement.
We, Darcy and Summer and SK believe we can do ANYTHING…Hmmmm
Summers original scaled drawings were sent to a silk-screening company in California.

The Cheap Transfer Sheet Company.
They laser cut a stencil and used the stencil to paint real chocolate powder onto Mylar sheets.
The sheets of chocolate designs on clear Mylar were sent to us and then the real work began.
![]()
![]()


We designed a mold which could be adjusted to different lengths. Lay the chocolate transfer sheet chocolate side up of course. Tape it securely. We taped the metal stainless steel flat rods to the length according to the sizes needed for the finished product. Our biggest was 4″x16″ by 1/4″ deep.
In a double broiler we melted pure white chocolate and stirred till very smooth, then poured it into the readied mold. A stainless steel scraper was used to pull the melted chocolate over the mold. Not overworking. Then scraped the excess chocolate over the edge to re-use again.
Each mold configuration was made to match the cakes layers. I made 8 sets for each cake layer. which there were 4 layers soooo…that makes a total, ahhh? 32, 1/4″ deep by 4″ tall and 5″,7″,16″,18″.
When the chocolate had cooled and hardened, we slipped a cake decorator spatula under the mold, wax paper and hardened chocolate. Very gently lifting up. We used a warm knife to cut around the edges of the mold to loosen the chocolate from the mold.Turning it over you can see the transfer sheet with the dark chocolate drawings. Peel the transfer sheet off very carefully and the design stays on the white chocolate. Some hits and misses can be expected so we made an extra 10 just for any last second emergency. We so glad we had multiples of left-overs on hand. In transit some of the “sidewalls” came loose from the actual cake and shattered. We were able put up new walls when we arrived at the venue. ( I learned from the best, Ron, my dad is a custom general contractor). New walls? No problem. We kept all the finished pieces cool and dry till ready to use.
![]()

The chocolate walls were “glued” to the crumb coat frosted cake (which by the way is just a first coat of frosting decorators use to control cake crumbs from getting into the final frosting coat.)
We used white royal icing to “glue” the walls to each side of the cake layers. We all know there isn't a cake out there actually square, plumb or level. We had to adjust the walls by filling in behind areas with royal icing. using a metal square to keep an eye on the level, plumb and square issues. A ribbon was used to tie the walls to the cake till they were dry and sealed.  When all four layers were stacked and stable
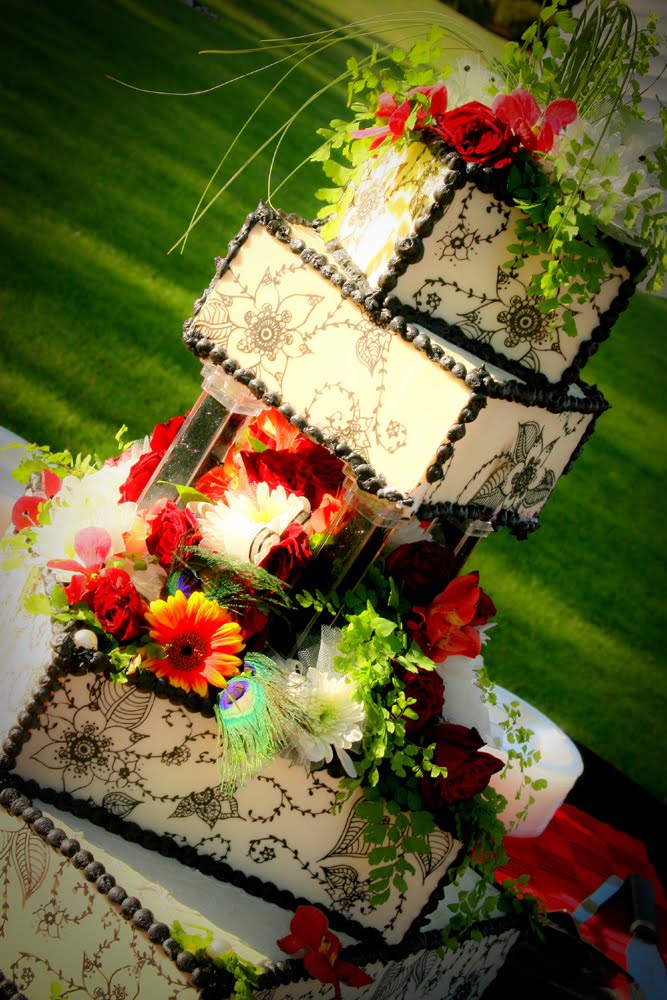
I started the piping which ran around the base, corners and edges of each layer. We used black butter cream icing. When this task was completed mom set about the next phase: Fresh flowers.
Oh by the way the bottom layer of cake is a plywood box with holes drilled in the top and dry ice inside to protect the three upper layers of cake from the heat. We just decorated it to look as if it were cake. Try cutting into that layer with a cake knife…
As the cake was in its last minute "project" phase, the bride hovered...having to add her two bits.
Who would have known this day would hit temperatures over 100 degrees. As we battled on, tempers ran a little short and we needed to keep the cake as cool as possible.
But onward and upward we prevailed. The end artistic masterpiece was complete.

Thanks for joining us in the journey..
The Sartell girls had fun...Forces of Nature Is What We Are...
No comments:
Post a Comment